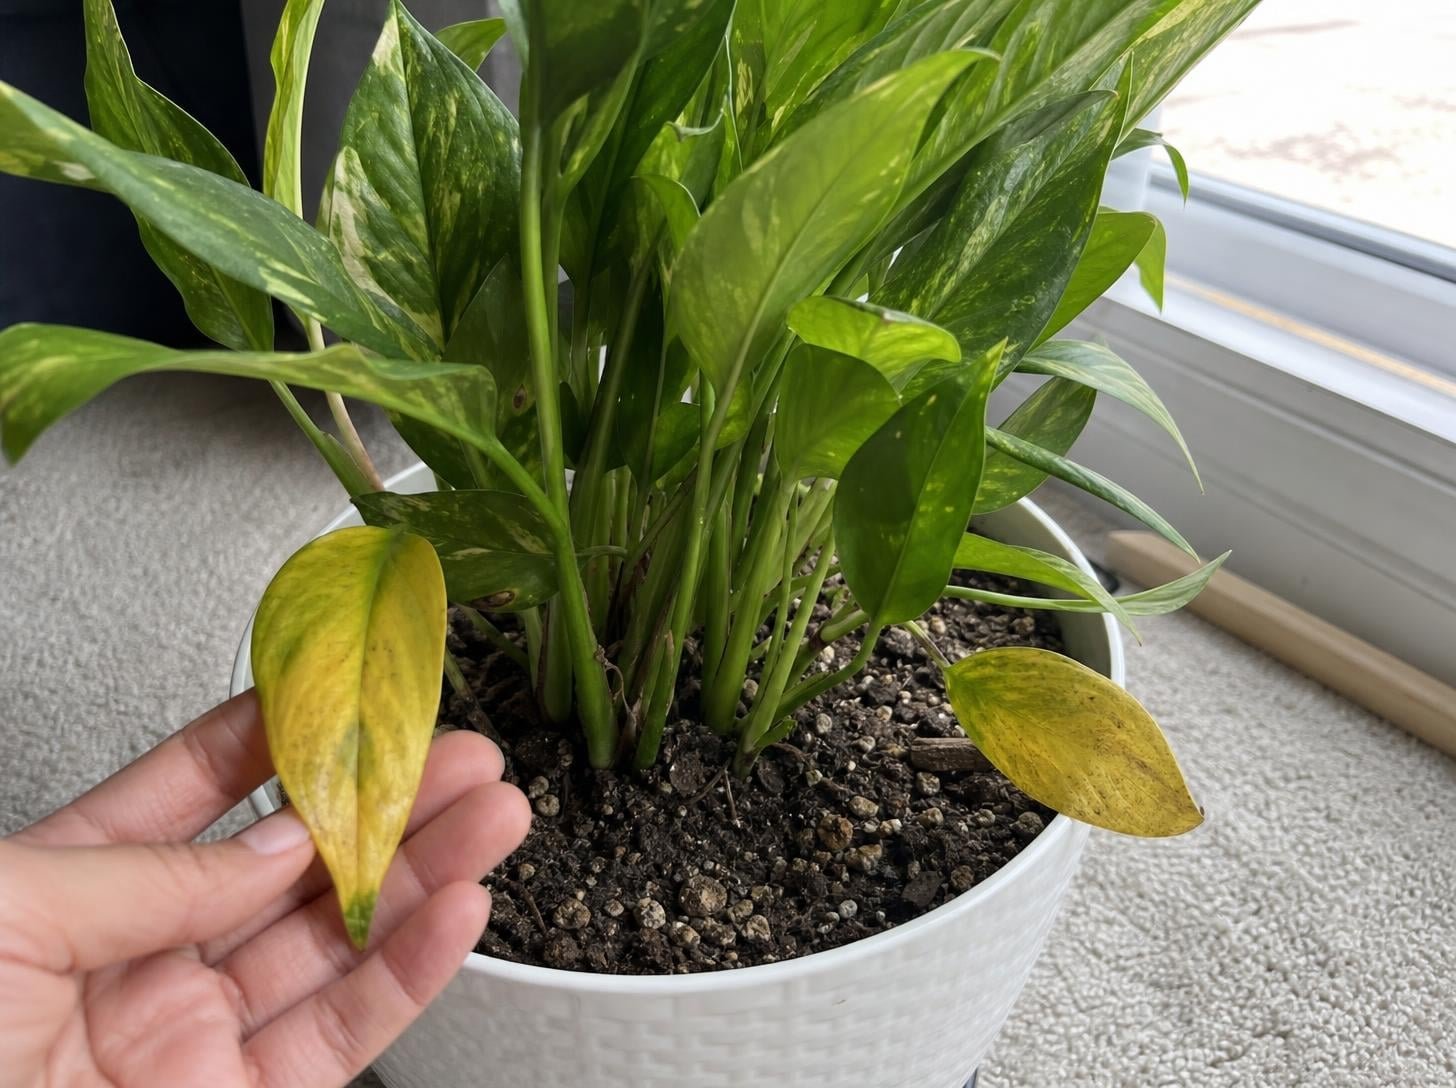
A yellow leaf is usually the first sign that a houseplant is not happy.
It is also one of the hardest signs to read, because so many different problems can cause it. Too much water, too little light, a cold draft, a few bugs under a leaf, or a pot that has become too tight can all turn a green leaf yellow. Iowa State Extension points out that several of these causes often show up at the same time, which is why the answer is not always obvious.
The good news is that you can usually figure it out in about five minutes if you know what to look for. Check which leaves are yellow, feel the soil, and look at the roots if you need to.
This guide goes through the seven most common causes in the order I would check them. For a wider look at care habits that cause trouble, see our list of 11 houseplant mistakes.
The Short Answer
Houseplant leaves most often turn yellow because of:
- Too much water, or a pot that does not drain
- Too little water, or uneven watering
- Too little light, or too much direct sun
- A recent move, a draft, or a sudden temperature change
- Pests living on the underside of the leaves
- Too little fertilizer, or too much
- Roots that have run out of room
I always check watering first. Extension educators at the University of Maryland call overwatering the most common cause of houseplant trouble in winter, and it is easy to do without noticing.
One more thing before you start. A single yellow leaf at the bottom of an older plant is often normal. If many leaves are turning yellow, or the yellow is moving up into new growth, something needs to change.
1. Too Much Water (and Pots That Do Not Drain)
Overwatering is the cause I see most often.
When soil stays soaked, the roots cannot get air. Cornell Cooperative Extension explains that waterlogged soil starves roots of oxygen, so they die and can no longer take up water and nutrients. The plant then looks thirsty and yellow at the same time, which confuses a lot of beginners.
Iowa State Extension describes the typical pattern when roots start to rot: the plant wilts, and the bottom leaves often turn yellow and drop first.
How to Check the Roots
Slide the plant out of its pot and look at the roots. Healthy roots are firm and white or light in color. University of Illinois Extension says dark brown to black roots point to overwatering, and the University of Arizona adds that black, squishy, or smelly roots mean rot.
What to Do
- Let the soil dry out fully, then start watering again gradually.
- If roots are rotted, trim them with clean, sharp tools and repot in fresh, well-draining mix.
- Water until the extra runs out the bottom, then empty the saucer so the pot does not sit in water.
- Make sure every pot has drainage holes. Missouri Botanical Garden notes that water can build up when a pot has no holes. If you love a decorative pot without holes, keep the plant in a plain pot with holes and set it inside.
- Skip the layer of rocks at the bottom of the pot. The University of Arizona says rocks take up room the roots could use and do not improve drainage.
Pot size matters too. Purdue Extension recommends moving up only one to two inches at a time, because a pot that is much too big holds extra wet soil and can lead to root rot.
If you tend to forget about your plants, or tend to give them too much attention, start with forgiving plants from our guide to low maintenance house plants.
2. Too Little Water, or Uneven Watering
Dry soil can turn leaves yellow too. Iowa State Extension lists both overwatering and underwatering as causes of yellowing and leaf drop.
The roots can give you a clue here as well. University of Illinois Extension says rusty orange to light brown roots suggest underwatering. The same source notes that erratic watering, where the soil goes from bone dry to soaked and back again, can cause brown leaf edges.
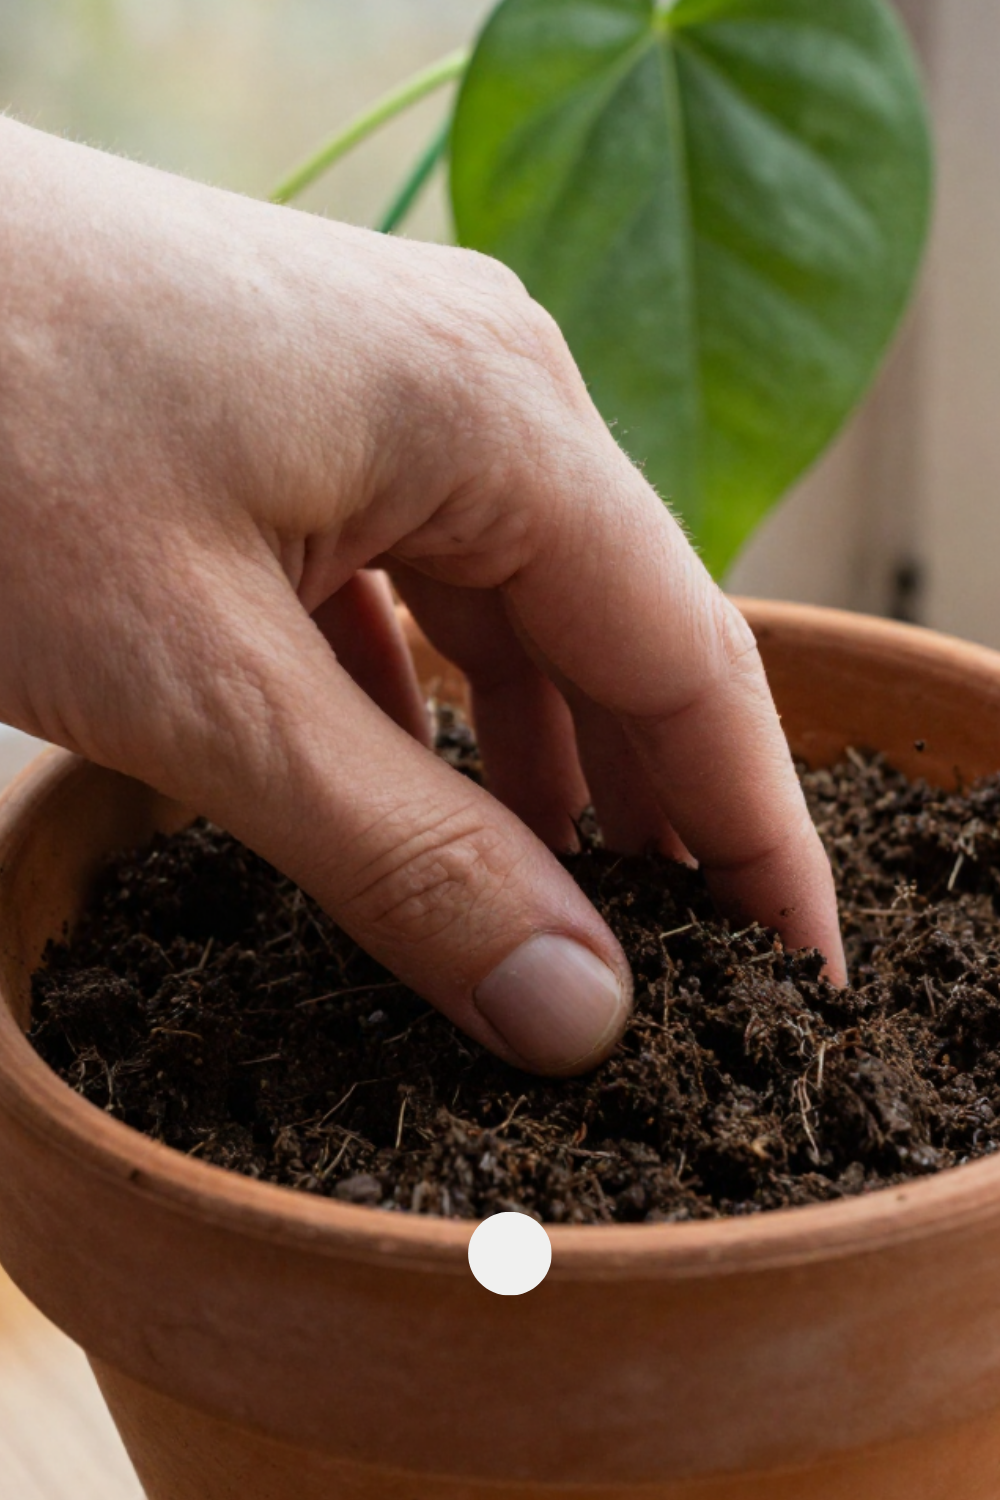
Use the Finger Test
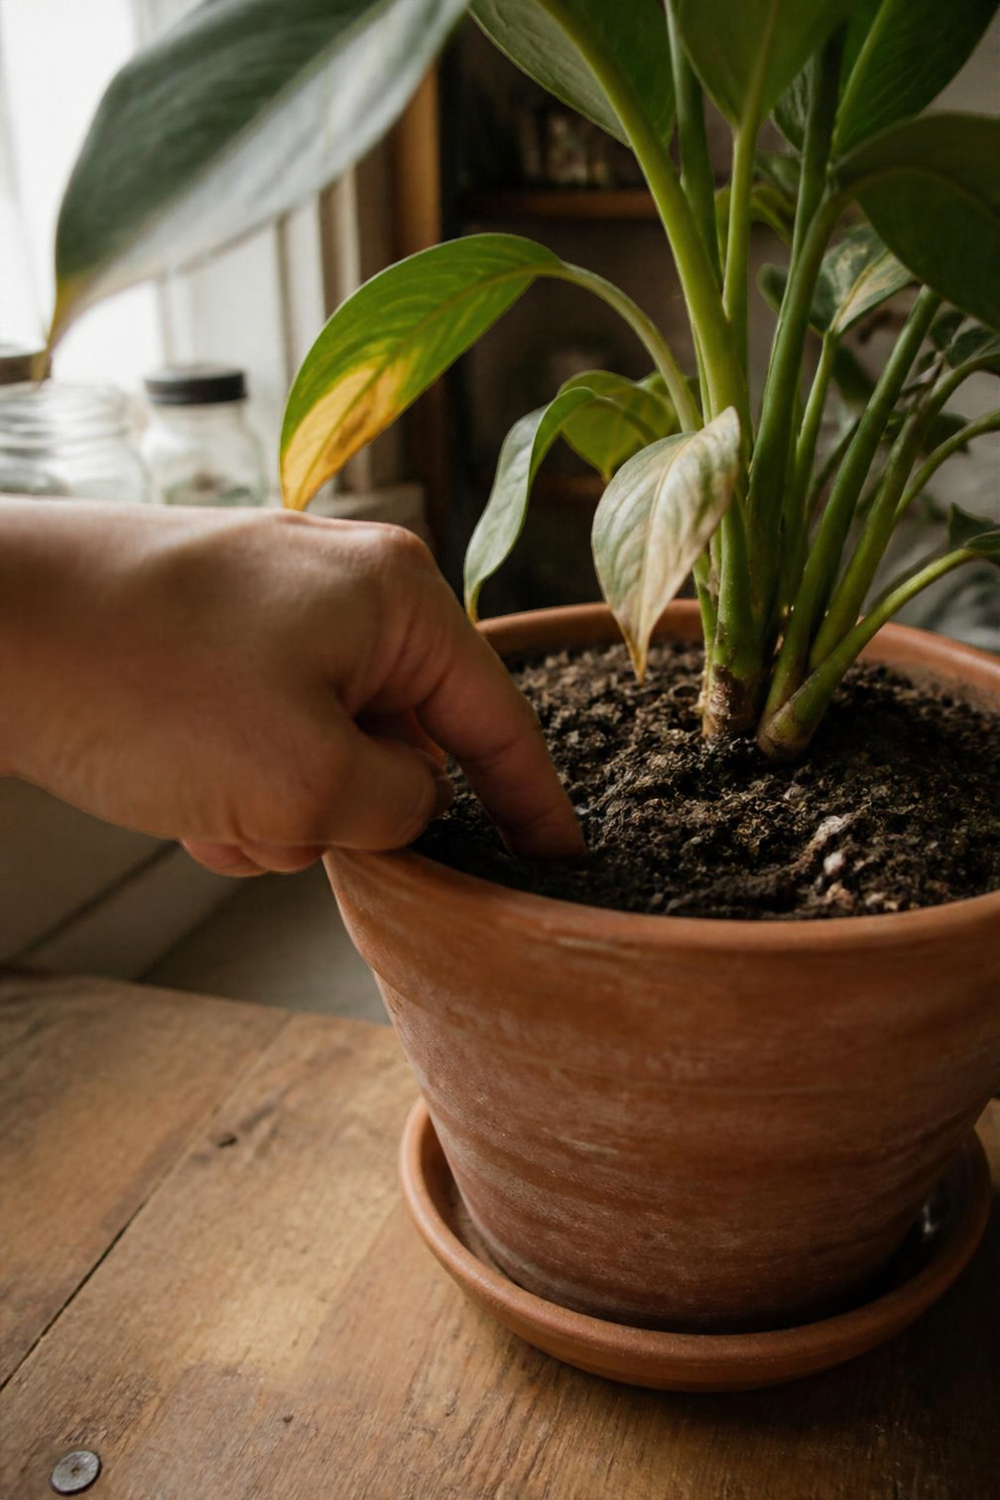
The top of the soil dries first, so looking at the surface tells you very little. Push a finger into the pot instead. The University of Arizona suggests going about one-third of the way down. If the soil feels damp, wait and test again. Purdue Extension suggests pushing a finger in past the first knuckle and watering only when the soil is dry.
When you do water, water well. The University of Arizona recommends watering until it runs out the bottom, so the lower part of the pot, where most of the roots are, gets enough. Do not leave the pot standing in the runoff.
Watering needs also change with the season and with how fast the plant is growing. A plant that needs water every week in summer may need much less in winter.
3. Light That Is Too Low or Too Strong
Plants make their food from light. When they do not get enough, older leaves can turn yellow and fall off. Purdue Extension says this is usually what happens when a plant is not getting enough light, and long, stretched stems are another sign.
Too much sun causes a different problem. The University of Arizona says strong direct light can bleach leaves, burn them, and turn them brown.
Window direction makes a big difference. According to the University of Arizona, a south-facing window gives the most intense light, east and west windows give about 60 percent of that, and a north window gives about 20 percent. Curtains, outdoor trees, and even a dirty window lower it further.
How to Fix a Light Problem
- Move a low-light plant closer to a window, but do it in steps. Iowa State Extension warns that a sudden change in light can make leaves drop.
- In summer, use a thin curtain to soften direct sun on plants that burn easily.
- Keep leaves from touching cold window glass in winter.
- Wipe dusty windows. You will be surprised how much brighter the room gets.
If your home is dim, you have two choices: pick plants that do well in low light, or add a lamp. Our guides to low-light indoor plants and natural vs. supplemental light cover both.
4. A Recent Move, a Draft, or a Temperature Swing
Houseplants do not like surprises.
University of Illinois Extension says plants often yellow or drop leaves after being moved to a new spot, and that they usually recover once they settle in. If the yellowing goes on for more than a few weeks, try another spot and adjust the watering slightly.
Missouri Botanical Garden adds that a cold snap, a drafty window, fumes from a stove, or a move can make many leaves yellow within a day or two. If the change was not extreme, plants often bounce back.
Temperature plays a part too. Iowa State Extension names blasts of hot or cold air from doors, windows, and air ducts as a cause of yellowing. Cornell Cooperative Extension says night temperatures around 60 to 65°F suit most houseplants, and warm nights can slow growth and cause yellowing.
What to Do
Look at what changed in the last few weeks. Did you bring the plant home, move it, or turn on the heat? Move it away from vents, radiators, exterior doors, and the cold glass of a winter window, then leave it alone. A plant that has just moved needs time more than it needs care.
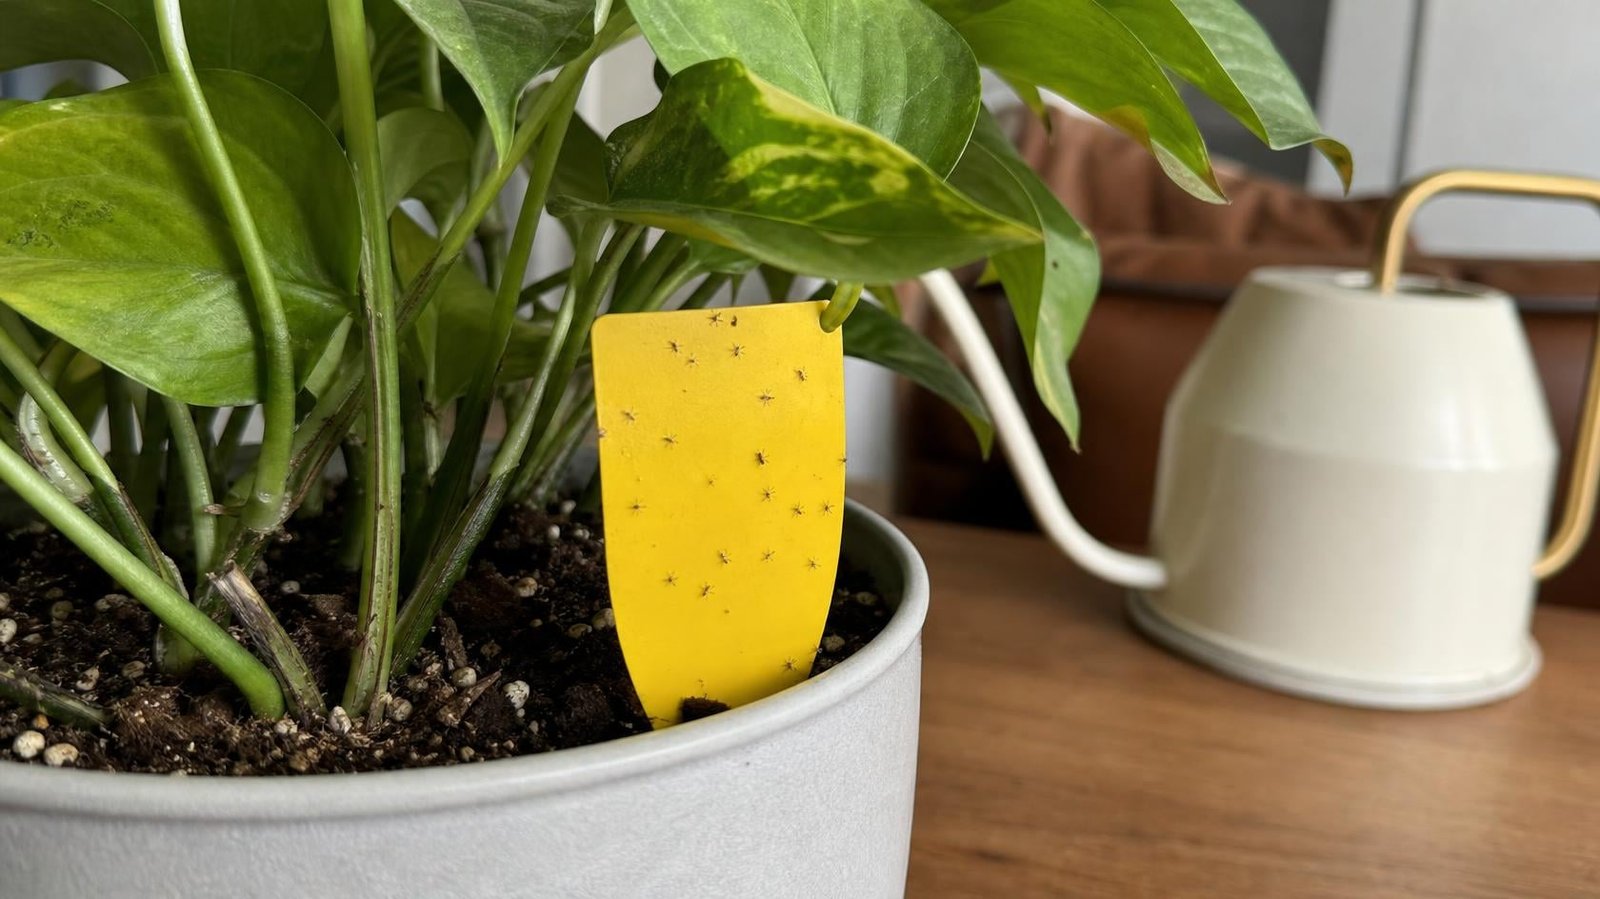
5. Pests on the Underside of Leaves
Most pests hide where you rarely look, so turn the leaves over.
Penn State Extension describes the common ones and what they leave behind:
- Spider mites cause tiny speckles, gray or bronze color, and fine webbing on the underside of leaves. They do best in hot, dry rooms.
- Mealybugs look like small white cotton clumps on stems and leaves.
- Scale looks like small round or oval brown or green bumps on leaves and stems.
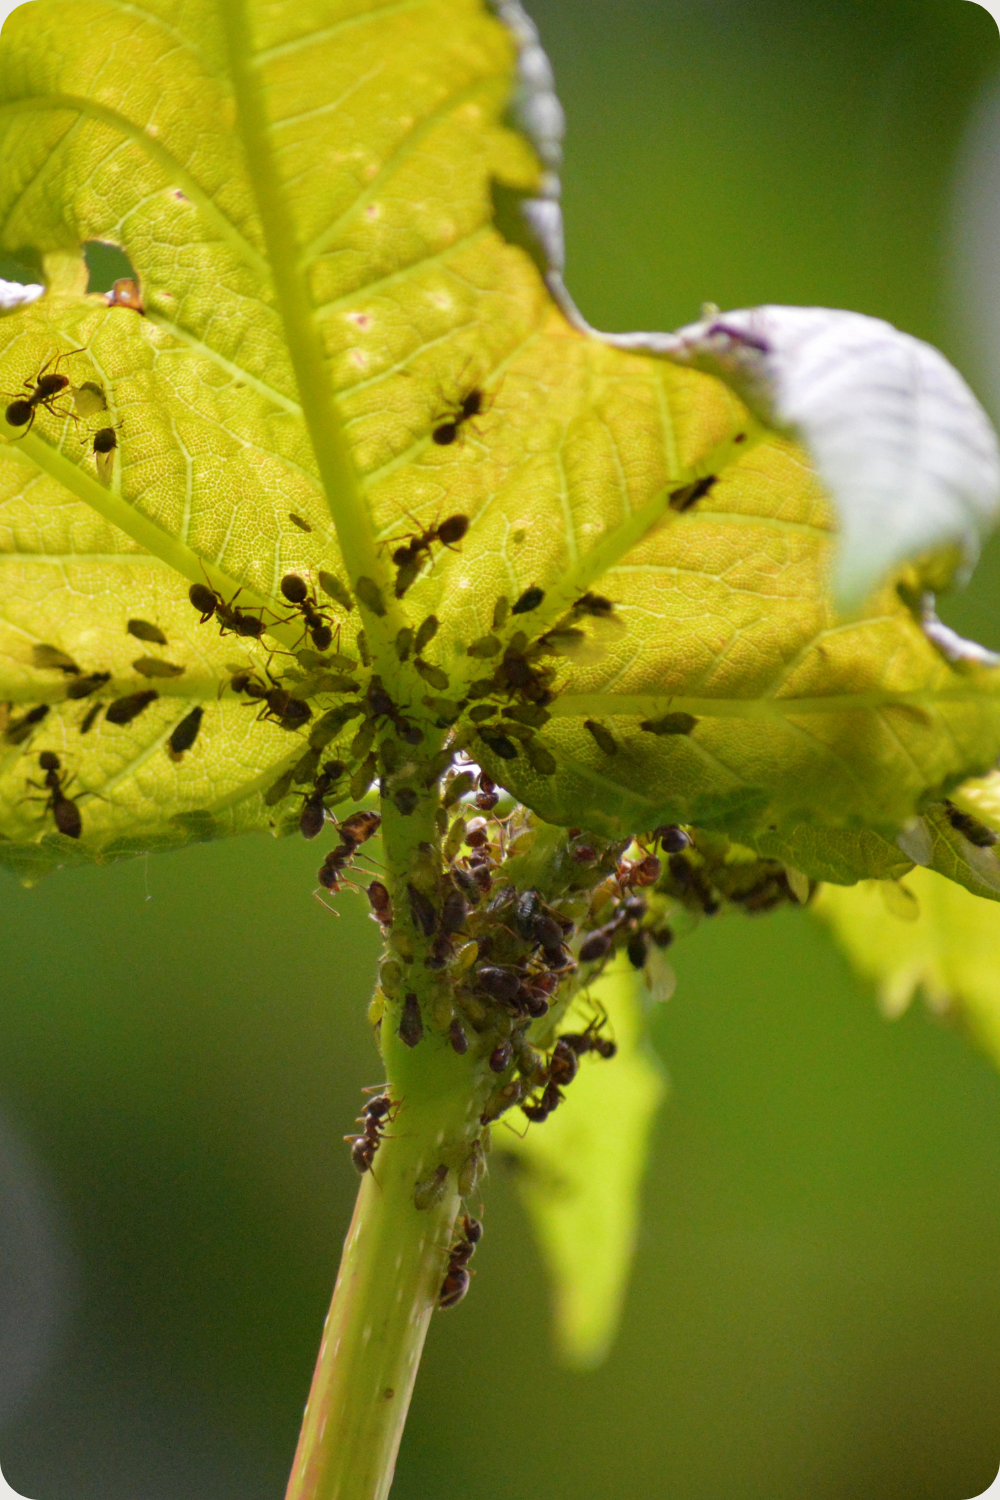
- Aphids cluster on new growth and the underside of leaves.
- Whiteflies are tiny white insects that fly up when you disturb the plant. They cause yellowing and leaf drop.
- Fungus gnat larvae feed on soil material and roots. The flying adults are annoying but do not hurt the plant directly.
A sticky, shiny film on leaves or on the table below is a good warning sign. Penn State Extension says aphids, whiteflies, mealybugs, and scale leave behind this sticky residue, called honeydew. A black sooty mold can grow on it and block light from the leaf.
If you see small flies around the soil, that usually points back to wet soil. Purdue Extension says soil gnats generally mean the plant is being overwatered.
Simple Ways to Deal with Pests
- Isolate the plant so pests do not spread to the others. Penn State Extension also suggests keeping new plants apart for about three weeks.
- Rinse both sides of the leaves with warm water.
- Dab mealybugs and hard-to-reach pests with a cotton swab dipped in rubbing alcohol.
- For a heavy problem, use insecticidal soap or horticultural oil, follow the label, and cover the leaf undersides. Use only products labeled for indoor plants.
- Clean your scissors or pruners after cutting an infested plant. Penn State Extension suggests a 10 percent bleach solution or full-strength rubbing alcohol.
For gentler options, take a look at our guide to organic bug sprays.
6. Fertilizer: Too Little, or Too Much
Fertilizer problems go both ways.
Too little: Iowa State Extension says under-fertilized plants often develop yellow leaves. University of Wisconsin Extension adds that when the whole leaf looks pale, low nitrogen is a common cause, and it suggests starting with the low end of the label rate because too much causes its own damage.
Too much: Cornell Cooperative Extension says too much fertilizer can burn roots. Fertilizer salts also build up in the soil over time. The University of Maryland describes the signs as browning at the leaf tips and edges, sometimes with yellowing, dead root tips, and a white crust on the soil surface.
When to Feed
Feed when the plant is actively growing, which usually means spring and summer. University of New Hampshire Extension says plants use added nutrients mainly when making new leaves and roots. University of Nebraska Extension says many plants rest in short, low-light winter days and need little or no fertilizer, and that you should not feed a plant that was just repotted or is wilting.
How often depends on the plant and the product. Advice from Extension sources ranges from every few weeks to about every two months for water-soluble fertilizers, so I always follow the label on the bottle.
How to Flush Out Salt Buildup
Colorado State University Extension describes a simple way to do this at home:
- Scrape off the white crust and about a half inch to an inch of the top soil.
- Set the pot in a sink with the saucer removed.
- Fill the pot to the top with lukewarm water, let it drain completely, and repeat about two times.
- Wash the saucer and scrape salt from the outside of the pot.
- Add fresh potting mix to replace what you removed, then water lightly.
- Water again only when the root ball feels dry.
The University of Nebraska suggests flushing every four to six months as a habit. Softened water can add salts too, so use unsoftened water if you have the choice.
7. Roots With No Room Left
A plant that has filled its pot cannot take up water and nutrients well, and the leaves show it.
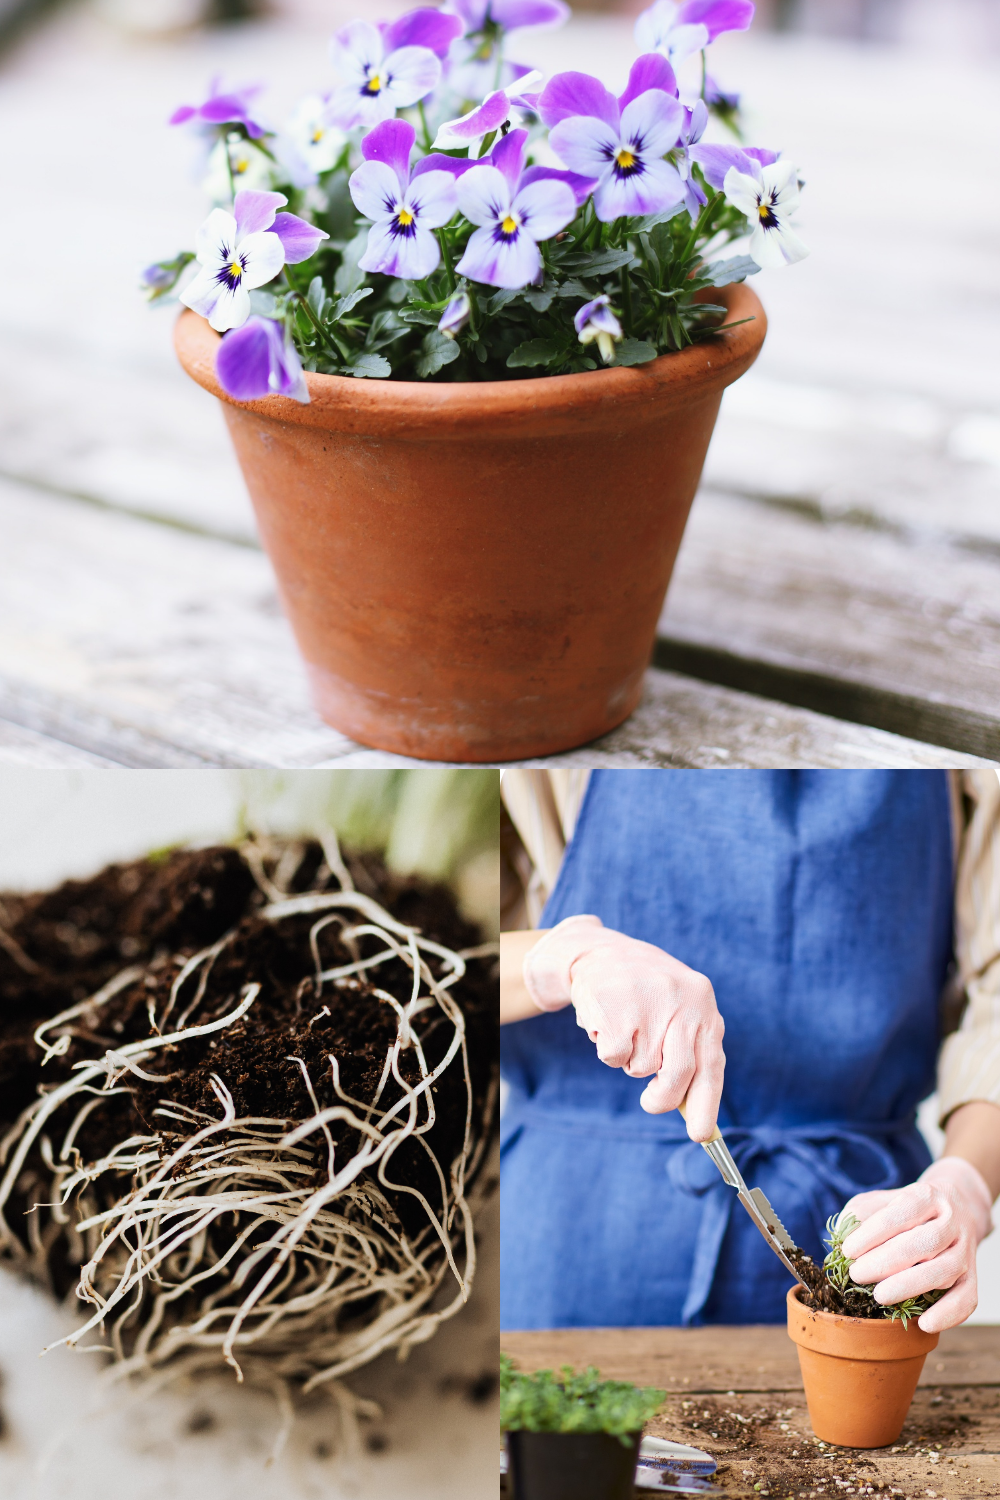
Colorado State University Extension says to look for roots circling inside the pot or growing out of the drainage holes. To check, turn the pot upside down with your hand over the soil, lift the pot off, and look at the root ball. A thick white mass of circling roots means it is time to repot.
The University of Arizona gives another hint: if you cannot push a finger about 2 inches into the soil, the plant may be root bound, or the mix may be too dense.
How to Repot
- Do it in spring or early summer, when the plant is actively growing.
- Choose a pot only one to two inches wider than the current one.
- Loosen or cut circling roots, and trim any rotted ones with clean tools.
- Set the plant in fresh potting mix and leave about half an inch to an inch of space below the rim.
For a full walkthrough, see our guide on how to repot a plant in 9 steps.
When Yellow Leaves Are Normal
Not every yellow leaf is a problem.
Missouri Botanical Garden says a few yellow leaves are not a worry. When a plant makes new leaves, the oldest ones often turn yellow and drop. University of Wisconsin Extension says the same: yellowing on a few older, lower leaves is usually normal, because plants let go of leaves that are not producing much.
It is normal if:
- Only one or two of the oldest, lowest leaves are yellow
- The plant is putting out new growth
- The rest of the plant looks firm and green
It is a problem if the yellow spreads to newer leaves or to many leaves at once. In that case, go back through the list above.
Match What You See to the Likely Cause
Here is a quick way to narrow it down:
- Lower leaves yellow, soil still wet, plant wilting: too much water or root rot.
- Yellow leaves, soil bone dry, crispy or brown edges: too little water, or watering that is uneven.
- Small, pale leaves and long, stretched stems: not enough light.
- Pale or bleached patches on the leaves closest to the window: too much direct sun.
- Many leaves yellow within a few days after a move or a cold night: shock from a change. Give it time.
- Tiny speckles, webbing, sticky residue, or white cotton clumps: pests.
- Whole leaves look pale and growth is slow: the plant may need feeding.
- White crust on the soil and brown tips along with yellow leaves: fertilizer salts.
- Roots circling the pot or growing out the bottom: root bound.
A Simple Five-Minute Check
- Count the yellow leaves and note where they are. Old, lower leaves tell a different story than new growth.
- Do the finger test. Is the soil wet, damp, or dry a couple of inches down?
- Look under the leaves, along the stems, and at the soil surface for pests, sticky residue, or a white crust.
- Think about the last few weeks. Did the plant move, or did the weather or the heating change?
- If you still do not know, slide the plant out of the pot and look at the roots.
Change one thing at a time and give it a couple of weeks. If you change the watering, the light, and the fertilizer all at once, you will not know what worked.
Should You Cut Off Yellow Leaves?
Once a leaf has turned fully yellow, it is no longer doing much for the plant, and the plant is already drawing resources away from it. I remove fully yellow leaves with clean scissors so the plant puts its energy into healthy growth.
If a leaf is only partly yellow, I leave it while I work on the cause, and trim it later. If you have been treating pests, clean your scissors afterward.
Frequently Asked Questions
Will Yellow Leaves Turn Green Again?
Usually not. A leaf that has turned fully yellow rarely recovers. The goal is to stop new leaves from turning yellow by fixing the cause.
How Many Yellow Leaves Is Too Many?
One or two old leaves at the bottom of the plant is common. If many leaves are turning yellow, or new leaves are affected, something needs to change.
Can Both Overwatering and Underwatering Cause Yellow Leaves?
Yes. Iowa State Extension lists both as causes. Checking the soil with your finger, and the roots if needed, tells you which one you are dealing with.
My Plant Just Came Home and Is Dropping Yellow Leaves. Is That Normal?
It can be. Plants often yellow or drop leaves after a move and usually recover when conditions suit them. If it continues for more than a few weeks, try a different spot and adjust the watering slightly.
Should I Fertilize a Plant with Yellow Leaves?
Check the watering and light first. Fertilizer will not fix root rot or a lack of light, and University of Nebraska Extension says not to feed a plant that is wilting or was just repotted. If the plant is actively growing and the whole leaf looks pale, a low dose of houseplant fertilizer may help.
How Do I Know If It Is Pests?
Look at the underside of the leaves and along the stems. Speckles, webbing, white cotton clumps, small bumps, or sticky residue point to pests. A magnifying glass or your phone camera helps.
Do I Need to Repot a Plant with Yellow Leaves?
Only if the roots are crowded or rotted, or the soil has broken down. Look at the roots first. If the plant is fine and the cause is something else, repotting can add stress.
Final Thoughts
Yellow leaves are a message, not a verdict.
In most homes the cause is one of a few things: water, light, a change in the plant's surroundings, pests, feeding, or tight roots. Start with the easy checks. Feel the soil, look under the leaves, and think about what changed recently.
Fix one thing at a time, give the plant a couple of weeks, and watch the new growth. New leaves that come in green tell you that you found the problem.
If you are still learning the basics, our beginner's guide to houseplant care is a good place to start.
References
- Iowa State University Extension: What Causes Leaves on My Houseplant to Turn Yellow or Brown and Drop Off?
- Iowa State University Extension: Prevent Root Rot Problems on Houseplants
- Cornell Cooperative Extension: Houseplant Foliage Yellowing
- University of Illinois Extension: Keep Houseplants Happy with Simple Solutions
- University of Arizona Cooperative Extension: Indoor Plant Care
- Purdue University: Four Steps for Thriving Indoor Plants
- Penn State Extension: Pest and Disease Problems of Indoor Plants
- Colorado State University Extension: Leaching Salts from Potting Mixes
- Colorado State University Extension: Repotting Houseplants
- University of Nebraska-Lincoln Extension: Success with Houseplants, Fertilization
- University of New Hampshire Extension: Fertilizing Houseplants
- University of Maryland Extension: Fertilizer Toxicity or High Soluble Salts in Indoor Plants
- University of Maryland Extension: Indoor Plant Problems, Nonliving Causes
- Missouri Botanical Garden: Why Are the Leaves on My Indoor Plant Yellowing?
- University of Wisconsin Extension Horticulture: Analyzing Reasons for Yellow Leaves